How to Cook Quinoa: Fluffy Every Time
Quinoa is one of the most useful grains to keep in the pantry. It cooks in about fifteen minutes, it is good warm or cold, and it fits into salads, bowls, soups, breakfast porridge and side dishes. It also has a reputation for turning out soggy or bitter, but both problems are easy to avoid once you know a few simple steps.
Botanically, quinoa is the seed of a plant related to spinach and beets rather than a true cereal grain, but it is cooked and eaten like one. White quinoa is the mildest and fluffiest; red and black quinoa are slightly firmer and nuttier and hold their shape well in salads. This guide works for all three.
Step 1: Rinse it well
Quinoa seeds are naturally coated with compounds called saponins that taste bitter and soapy. Most packaged quinoa has been pre-rinsed, but a quick rinse at home removes any that remain. Put the quinoa in a fine-mesh sieve and run cold water over it for 30 seconds to a minute, rubbing it with your fingers, until the water runs clear and no longer looks foamy. Shake it well to drain.
A regular colander has holes that are too large; the tiny seeds will slip through. A fine sieve is worth having for quinoa, rice and lentils.
Step 2: Use the right ratio
The most common reason for mushy quinoa is too much water. Many packages recommend two cups of water per cup of quinoa, but a slightly lower ratio of 1 3/4 cups water to 1 cup quinoa gives fluffier, more separate grains. One cup of dry quinoa makes about three cups cooked, enough for four side servings.
- 1 cup quinoa + 1 3/4 cups water or broth + 1/2 tsp salt
- 1/2 cup quinoa + 3/4 cup plus 2 tbsp water + 1/4 tsp salt
- 2 cups quinoa + 3 1/2 cups water + 1 tsp salt
Step 3: The absorption method
Combine the rinsed quinoa, water and salt in a saucepan with a tight-fitting lid. For extra flavor, toast the drained quinoa in a teaspoon of oil for two minutes first, stirring, until it smells nutty. Bring the water to a boil, then cover, reduce the heat to the lowest setting and simmer for 15 minutes.
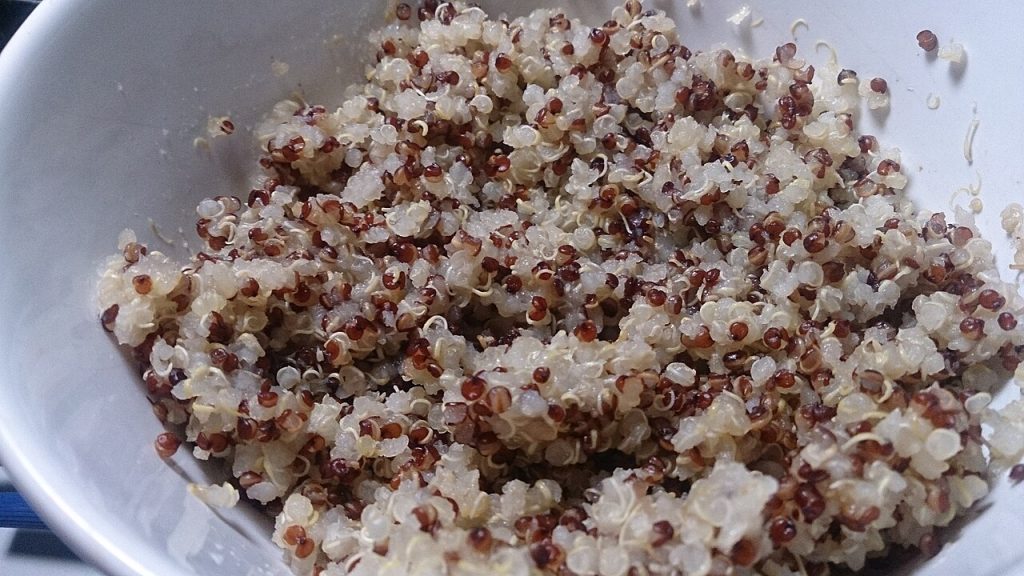
Turn off the heat and leave the pot covered for 5 to 10 minutes. This resting time lets the grains finish steaming and firm up. Then remove the lid and fluff the quinoa gently with a fork. You will see that each seed has a small, curly white tail, the germ, which separates during cooking. That is a sign it is done.
Alternative: the pasta method
If you often end up with wet quinoa, try cooking it like pasta. Bring a large pot of salted water to a boil, add the rinsed quinoa and boil uncovered for 10 to 12 minutes, until tender with a slight bite. Drain in a fine sieve, then return it to the warm pot, cover with a clean towel and let it steam dry for 10 minutes. This method is almost foolproof and great for salads, though a little flavor is lost in the cooking water.
Troubleshooting
- Soggy quinoa: too much water or too short a rest. Spread it on a tray to let excess moisture evaporate.
- Crunchy quinoa: not enough water or the lid was not tight. Add 2 tablespoons of water, cover and cook on low for 5 more minutes.
- Bitter quinoa: it was not rinsed thoroughly.
- Stuck to the pot: the heat was too high. Use the lowest setting while it simmers.
Storing and using cooked quinoa
Cool cooked quinoa quickly by spreading it on a tray, then refrigerate it in a covered container for up to five days. It also freezes well: pack it in flat freezer bags in portions and freeze for up to two months. Thaw in the refrigerator or warm it straight from frozen with a splash of water.
Use it as a base for grain bowls with roasted vegetables, toss it with chopped herbs, lemon and olive oil, stir it into soups at the end of cooking, or warm it with milk, cinnamon and fruit for breakfast.
Once you have cooked quinoa a couple of times with your own pot and stove, you will know whether you prefer it a little drier or softer, and you can adjust the water by a tablespoon or two. A batch cooked on the weekend makes weekday lunches much easier.
This guide is general kitchen information, not food-safety certification or medical advice. See our Disclaimer and Image Credits.